Hello everyone,
Since my adorable little grandson was born, I haven't and barely crocheting. I am working on a large throw for my niece.
So, now it's time to get back on planet earth and get working. There is a craft show coming up on May 5th at the Hometown Farmers Market. The place is huge! I am hoping to do well setting up a table and selling some of my items. Then I can clean out and re-organize what I have left to get a better idea of what is selling and what is not.
I have been working on Amiguruimi animals lately. My mother gave me a book that she bought for me that is full of little critters to crochet.
I was trying to put pics of all of my amigurumi animals in my gallery, but I am having trouble getting them to download to my blog. That won't stop me for long, I am determined!
If any one has any ideas for topics for me to blog about, please let me know and I will do my best to get it on here.
Keep an eye out for those pics, they are coming your way soon!
Happy Hooking!
Friday, April 19, 2013
Tuesday, March 26, 2013
Meet Logan Patrick Slemmer!

I have wanted to be a grandmother for a very long time now. I am the last of my frie nd to join this wonderful club.
My husband and I live 100 miles away from the rest of the family. My son-in-law called me at 4:30 in the morning. He told us that My daughter was in labor! I was thrilled to hear that. I woke up my husband and told him and neither of us could get back to sleep. We were so pumped up on adrenaline. We had to wait before we could go down. My son had school, and my husband went into work for 1/2 a day. We shot down there after we got my son out of school early.
Logan arrived about 5 or 10 minutes after we got to the hospital.
I'll tell you, after being up on adrenaline for so long, and the emotions of the day, I am crashing really hard today! I'm having trouble keeping my eyes open! lol.
Needless to say, I am super excited to have him here and finally able to hold him. He is precious and we Love him very much.
Monday, March 25, 2013
He's almost here!!!
I am very excited as I nervously type this out because my daughter is in labor and about to deliver my first grandchild!!
I've spent the past 8 months crocheting baby clothes, booties, blankets, hats, diaper covers, bibs, a mobile, etc. and now the time has finally come. I will get to meet our little man in a few short hours. Although those 'short' hours feel like an eternity when you are waiting, lol.
I can tell you, this baby is blessed right from the start. He is coming into a large, close, loving family. He will have everything he needs and most of what he wants. And more love than he will know what to do with. His mommy and daddy are a wonderful couple.
Mommy has always wanted kids. Since she was a teenager she had a plan set in place for getting married, getting a house, and having children. And it all fell into place for her.
Daddy is a very level headed man who is also great with kids. He made sure my daughter had the wedding she wanted, he is fantastic with keeping finances in place to make sure his family is provided for.
Mommy is beautiful and daddy is handsome, so they are also a great looking couple.
Grandmom and Grandpop (on both sides) are very excited and will spoil this child and shower him with love.
Great-Grandmom and Great Grandpop will shower him with just as much love and I know they will spoil him just as much.
Please send your happy prayers asking God to give this child a long, happy, successful life filled with love and good will.
A very nervous grandmom will update you when he is here. :-)
Wednesday, March 6, 2013
Small turtle dishcloth pattern

This is the pattern for the small turtle dishcloth. It can also be used as a coaster.
Materials:
100% Cotton Yarn (2 colors)
Tan variegated for center, Sage green for outside edge and feet.
Size G crochet hook
Tapestry needle
Stitch Markers (5 orange, 4 teal)
Abbreviations:
Ch=chain, sc= single crochet, slst= slip stitch, TP= Triple Picot, sc2tog= single crochet 2 together, st(s) = stitch(es), Rnd = round, TN=Tapestry Needle, SM=Stitch Markers
Special instructions:
Piece is worked in rounds, join each round with a slip stitch.
I used 2 different color stitch markers to mark head & tail, and feet. I used 3 orange markers for the head, 2 orange markers for the tail, and 4 teal markers for the feet
Feet are made asymmetrical to give the illusion that the turtle is walking.
Special Stitches:
Triple Picot:
Ch 3, slst in 2nd ch from hook, sc in next ch, ch 2 slst in 2nd ch from hook, sc in same as 1st sc, ch 2 slst in 2nd ch from hook, sc in same as 1st sc.
This will make 1 foot with 3 toes.
Directions:
With tan variegated
Ch 2
Rnd 1: 6 sc in 2nd ch from hook, join with slst (6 sts)
Rnd 2: Ch 1, sc in same as ch 1 space, 2 sc in each st around, join. (12 sts)
Rnd 3: ch 1, sc in same as ch 1 space, *2 sc in next st, 1 sc in next st*, * to * 6 times, join. (18 sts)
Rnd 4: ch 1, sc in same as ch 1 space, sc in next st, *2 sc in next st, sc in next 2 sts* repeat * to * 6 times, join. (24 sts)
Rnd 5: ch 1, sc in same as ch 1 space, sc in next 2 sts, *2 sc in next, sc in next 3 sts* repeat *to * 6 times, join (30 sts)
Rnd 6: ch 1, sc in same as ch 1 space, sc in next 3 sts, *2 sc in next st, sc in next 4 sts* repeat *to* 6 times, join (36 sts)
Rnd 7: ch 1, sc in same as ch 1 space, sc in next 4 sts, *2 sc in next st, sc in next 5 sts* repeat *to* 6 times, join (42 sts)
finish off center, sew in ends with TN

Place orange SM in joining slst and 1 on each side (3 SM to mark head)
DO NOT COUNT CENTER MARKER
Starting at marker to the left, count 21 sts, place SM in 21st st.
Starting at marker to the right, count 21 sts, place SM in 21st st.
You should have 2 orange markers next to each other to mark the tail (see illustration above)
DO NOT COUNT MARKERS FOR HEAD
Count 5 sts on both sides of head, place teal SM in 5th st on each side to mark front feet
DO NOT COUNT MARKERS FOR TAIL
Count 6 sts on either sde of the tail, place teal SM in 6th st on each side to mark back feet
Rnd 8: Join 2nd color 2 sts to the right of head markers, sc in same as joining st and sc in next 9 sts. (be sure to move SM for head up to this row)
sc in next st, TP, sc in next st (1st foot)
sc in next 7 sts
sc in next st, TP, sc in next st (2nd foot)
sc in next 4 sts
sc in next st, ch 3, sl st in next 2 chs, sc in next st (tail)
sc in next 5 sts,
sc in next st, TP, sc in next st (3rd foot)
sc in next 7 sts
sc in next st, TP, sc in next st (4th foot)
sc in next 2 sts, join with slst to 1st sc
Head:
Slst in next st, ch 1 sc in next 3 sts, slst in next st, ch1, turn (5 sts)
Slst, sc, sc, slst, ch1, turn (4 sts)
sc2tog 2 times, ch 1, turn (2 sts)
sc2tog, (1 st)
finish, sew in ends with TN

This pattern has not been tested by anyone other than myself. Any mistakes or any problems, please let me know so I can fix them.
I hope you enjoy this pattern.
Happy Hooking!
Tuesday, March 5, 2013
Turtle Dish Cloth pattern

This pattern has not been tested by anyone other than myself. Please let me know if you run into any problems with it. Thanks.
Materials:
2 colors of 100% cotton yarn.
Variegated tan for the center and a medium tone green for the outside.
Size G hook (I use different sizes to create different size wash cloths and I created a 'family' of turtles. I used a size H for the large turtle and a size G for the medium. The small turtle I had to change the pattern. I will post that pattern in a few days.
Tapestry Needle
Stitch Markers (2 different colors)
Abbreviations:
Ch = chain, Slst = Slip Stitch SC = Single Crochet, DC = Double Crochet, Sc2tog = single crochet 2 together, TP = Triple Picot, St(s) = stitche(s), Rnd - Round, TN = Tapestry Needle.
Special Stitches:
Triple Picot
Ch 3, Slst in 2nd Ch from hook, SC in next ch, Ch 2, Slst in 2nd ch from hook, SC in same as 1st SC, Ch 2, Slst in 2nd Ch from hook, SC in same as 1st SC
(This will make a foot with 3 toes)
Special Instructions:
Use 2 different color stitch markers I used orange to mark sts for head and tail, and teal to mark the sts for the feet
The feet are assymetrical to give the illusion that the turtle is walking.
This pattern is worked in rounds. At the end of each row Slst to first st to finish the round.
With Variegated Tan,
Ch 4, Slst to 1st chain to form a ring. Be careful to keep the ch straight and avoid twisting.
Rnd 1:
Ch 3 (counts as 1st st here and throughout), DC 11 times in ring, join with slst (12 sts)
Rnd 2:
Ch 3, Dc in same st as ch, 2 DC in each DC around, join with slst, (24 sts)
Rnd 3:
Ch 3, DC in same as ch, DC in next st, *2 DC in next st, DC in next st*, repeat from *to* 11 times, join with slst (36 sts)
Rnd 4:
Ch 3, DC in same as ch, DC in next 2 sts *2 DC in next st, DC in next 2 sts* repeat from *to* 11 times, join with slst (48 sts)
Rnd 5:
Ch 3, DC in same as ch, DC in next 3 sts *2 DC in next st, DC in next 3 sts* repeat from *to* 11 times, join with slst (60 sts)
Finish off, sew in ends with TN
Place Stitch marker in joining Slst and in st to either side (3 stitch markers, orange) This will be for the head
Counting from center stitch marker, count around circle 30 stitches on each side, place stitch markers in 30th sts (2 stitch markers, orange) This will mark the tail
DO NOT COUNT HEAD MARKERS, place stitch marker in 8th stitch from head on each side to mark front feet. (Teal stitch markers)
Place Stitch marker in 8th stitch from tail on each side to mark back feet (teal stitch markers)
See the pic below for reference

Rnd 6:
Join 2nd color with stst in 2nd st to the right of head, SC in same as joining st, SC in each st around, join with sl st. (60 sts) move stitch markers up one row as you crochet around.Rnd 7:
Ch 1, SC in same as ch 1 space, SC in next 12 sts, (be sure to replace markers for head),
SC in next st, TP, SC in next st (1st foot)
SC in next 11 sts,
SC in next st, TP, SC in next st (2nd foot)
SC in next 6 sts
SC in next st, Ch 3, Slst in next 2 chs, SC in next st (tail)
SC in next 7 Sts,
SC in next st, TP, SC in next st (3rd foot)
SC in next 9 sts,
SC in next st, TP, SC in next st (4th foot)
SC in next 4 sts, join with Slst to 1st SC.
Head:
Slst in next 2 SC, Ch 1
SC where 3 st markers are, Slst in next SC, Ch 1 Turn
Sc2tog 2 times, Ch1 turn,
Sc2tog, finish off. Use TN to sew in ends.
I hope you enjoy this pattern.
Happy Hooking!
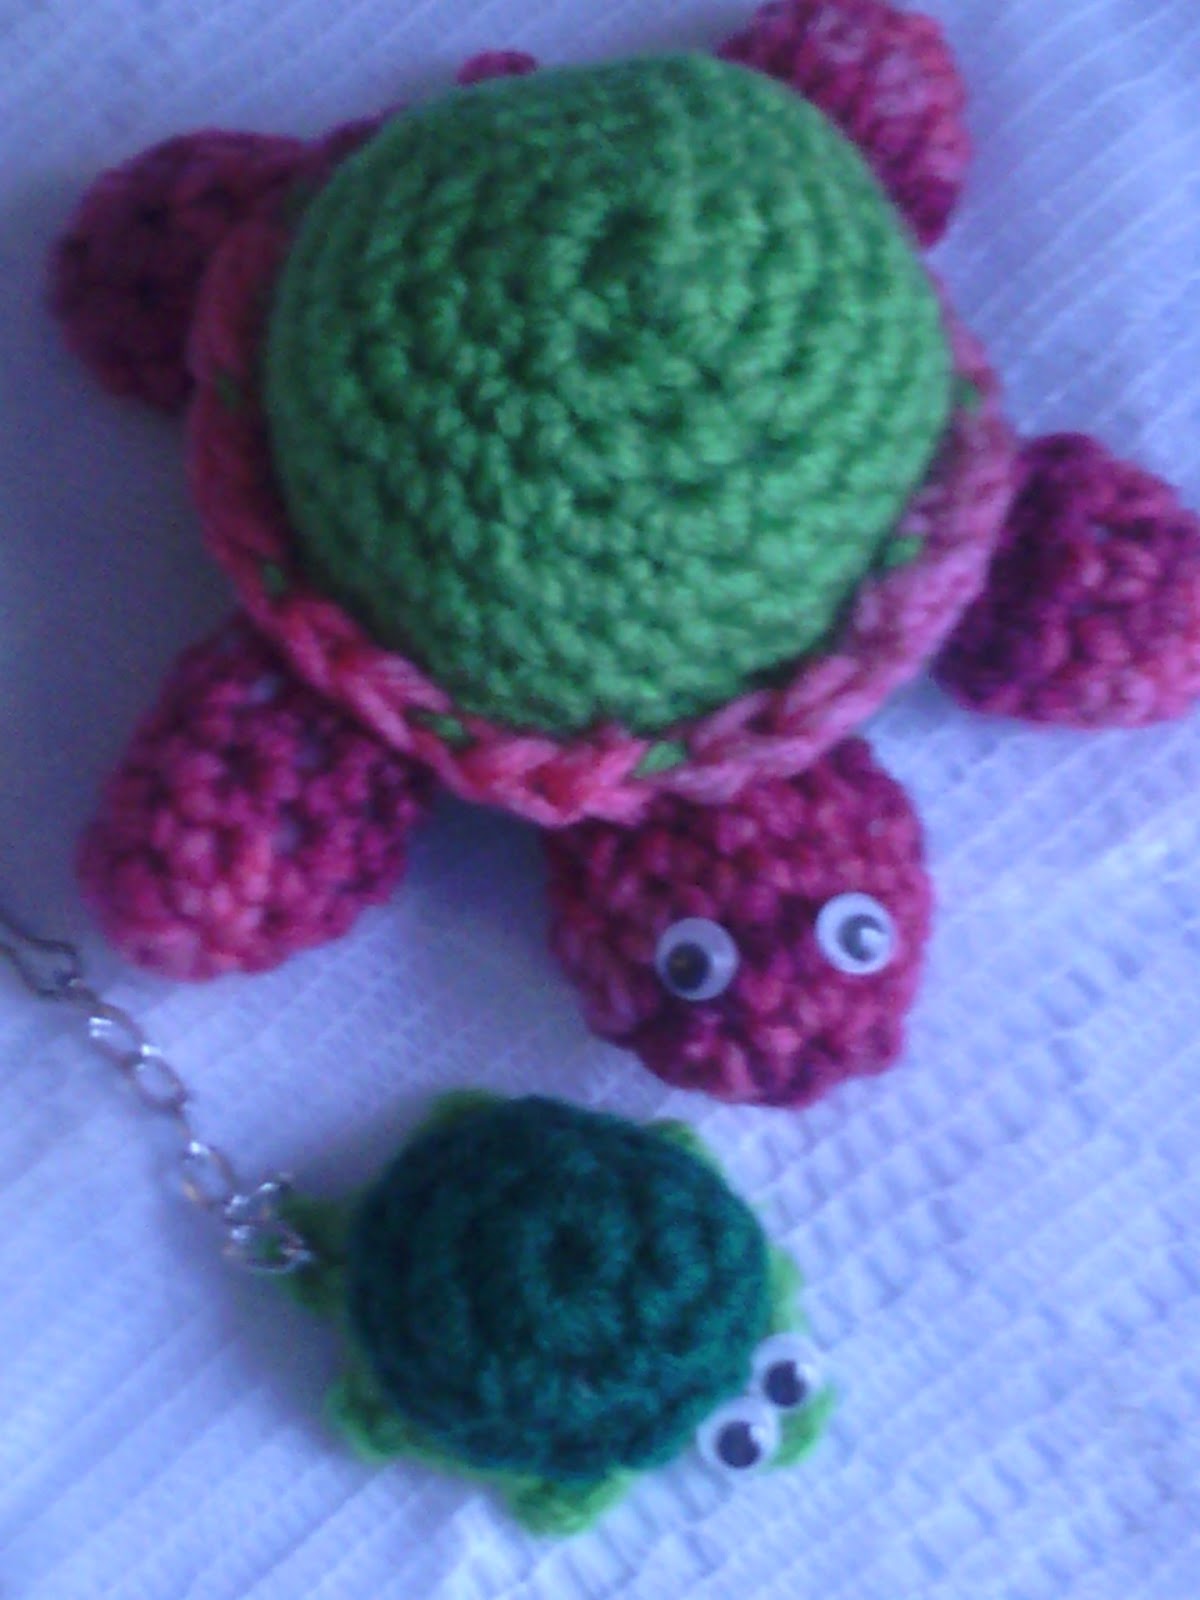
Itty-bitty-turtle
I've been making these cute little amigurumi turtles and someone asked me if I could post the pattern. Someone sent me this link and asked me to make these for them. They seem to be pretty popular and I've auctioned a few off on listia.com. If you are interested in making them, here is the link to the pattern.
http://www.ravelry.com/patterns/library/itty-bitty-turtle
the pics below are a couple of the ones I made.


I hope you enjoy making these as much as I did.
http://www.ravelry.com/patterns/library/itty-bitty-turtle
the pics below are a couple of the ones I made.


I hope you enjoy making these as much as I did.
Wednesday, February 13, 2013
I'm 50!! :- O
ACK!!! Today is my birthday. I am 50! I still can't figure out how that happened. lol. It doesn't seem like it was that long ago when I was young and dancing the night away. Well, I am still young at heart and even though I can't dance the night away, I dance when I can!
So far, the past few months have been great. I can't really complain about anything (that's a good thing), my kids are all healthy and happy, and I will soon have a beautiful new grandson to dote over. And, my crochet business is starting to take off. You can't ask for much more than that!
As usual I have a lot of things going on at once. My latest creations came from a suggestion from someone who asked me to make them a few things. These little turtle pin cushions and turtle key chains are very easy to make and they are adorable!

These little guys seem to be a good item to auction off on listia.com, I have had a few people watching and bidding on them. I am also working on a Bunny diaper cover and hat set that is still a work in progress. I am still not liking the way the monkey mobile is coming out. Hopefully I will be able to salvage it and make something from it.
Other than those few things, not much else going on. So as usual.....
Happy Hooking!
So far, the past few months have been great. I can't really complain about anything (that's a good thing), my kids are all healthy and happy, and I will soon have a beautiful new grandson to dote over. And, my crochet business is starting to take off. You can't ask for much more than that!
As usual I have a lot of things going on at once. My latest creations came from a suggestion from someone who asked me to make them a few things. These little turtle pin cushions and turtle key chains are very easy to make and they are adorable!
These little guys seem to be a good item to auction off on listia.com, I have had a few people watching and bidding on them. I am also working on a Bunny diaper cover and hat set that is still a work in progress. I am still not liking the way the monkey mobile is coming out. Hopefully I will be able to salvage it and make something from it.
Other than those few things, not much else going on. So as usual.....
Happy Hooking!
Saturday, February 9, 2013
Long time, no post!
Wow! It's been a while since I've posted anything. Unfortunately our house was hit by the flu and I got out of the habit of posting.
I have had a few projects going on (as usual). I was working on the Monkey Mobile, but I am not happy with it. I have to go change a few things, or just start over. I have a friend who thinks it looks good, but I am so critical of my own work. I won't put anything out there that I am not happy with.
I have also been unable to really focus until recently. I went through my remnants box and pulled out all the medium and really small balls of yarn that were in there. With the medium balls I made a few Tote bags that came out really nice. I have them listed as rainbow tote bags on my etsy shop.


With the smaller balls of yarn I am working on a throw rug that I will put in my bathroom in front of the shower. I will get pics of that when I am done and post them.
My craft room has been coming along nicely. We have 3 work desks in there! The computer desk (my son is usually planted there), my husbands fly tying station. He used a table that my older son made in high school wood shop, it is desk height and has 2 drawers, it is the perfect size for what he is using it for. He bought 2 shelving units and put them on top and then added another shelf across the top of the shelving units to create storage cubicles. It's nice having a master carpenter around the house for these projects.
My table is a desk that the former tenants left behind. It was in a storage space up in the attic. It is a beautiful desk that has a hutch top. So I have a small cabinet that has a glass door on it, and 2 cubicles and a large shelf across the top. As well as file drawers and another open cubby on the bottom of the desk.
It is really nice when we are all in there as a family working on our different projects!
I should be posting more regularly again.
Happy Hooking!
Wednesday, January 23, 2013
Monkey tree mobile progress
I am changing gears and putting a hold on my tote bag for now. I have to finish the monkey mobile before my daughters baby shower in February.
I will note my progress as I go.
So far I took 3 metal rings, extra small, small, medium and large. I single crocheted tan yarn onto the 3 larger rings. I left the extra small ring plain and will use that at the top to hang the mobile.
I used dark brown yarn and chained 75 stiches and attached them to the rings making a tree (small at top, medium, then the large at the bottom) with the chains hanging below the bottom ring.
I crocheted 150 leaves in different shades of green and I am sewing each leaf on separately. Doing it this way gives me a little more freedom with placement. I can see easier where there are spaces that need to be filled.
I used yellow embroidery floss and crocheted little bananas to place around the tree. I will place the monkeys on the rings after I have the leaves in place and straightened out. I am having a problem with the leaves folding up. I am going to use spray starch and an iron to flatten them out after I sew them all on.
These are pictures of my progress so far. My helpers name is "Puppy".


I love having a craft room where I can leave everything right where I am working on it. It is so much easier than trying to put everything away each time I work on it. I just go in, sit down and I can go right to work.
Friday, January 18, 2013
Remnants, remnants and more remnants

This is just one plastic bin filled with yarn remnants! I have a 3 drawer organizer that has 2 drawers full as well as a basket. I have been trying to figure out what to do with all of it. I decided how I am going to use some of it at least.
I need a new tote bag. So I decided I will use my yarn to make a colorful, granny square tote. This will be the first project that I post my progress as I go. I've chosen a few bright colors, blue, yellow, mint green, rose and pink. I may end up throwing a few other colors in as I go, but that's it for now.
If anyone has any ideas for projects for my remnants, please post them.
Yesterday, the zipper on my crochet hook caddy broke,. I decided instead of buying a new one, I would just make one myself. I went through my remnant bin and pulled out a blue/brown variegated yarn and a bright blue that matches it. I used the 'afghan' stitch for the body and the pockets and a single crochet to make the border and button holes.


I made a pocket for my hooks (obviously), a pocket to put my scissors, measuring tape and pen. I also hung safety pins from this pocket. And a pocket for stitch markers, needle threaders and sewing needles. I put 2 buttons on the outside to hold it closed.
I ran into a problem that I need to resolve,. Because the sides are open, my hooks keep sliding out. I am going to go in and add cloth to the hook pocket and the sides to help keep everything inside. If that doesn't work, I am going to scrap the entire idea and break out the sewing machine and make a new one.
Creating something new is always trial and error
Tuesday, January 15, 2013
Monkey Mobile
This is currently a work in progress. I am making a monkey Mobile for my grandson. I hope to have it done before the shower in February.
I was making this little monkey from an Amigurumi book that I have, He is so cute!
 After making the momkey I was playing around (being goofy) and I hung him from the vine that I made. I have the vine across the edge of a shelf like a garland. And he looked great hanging there and that gave me the idea to make a mobile.
I am going to take 2 rings, 1 large, 1 small, and make vines to hang from it, 1 vine down the middle and 4 down the sides. I will place vines around each ring also. I will hang a monkey on each vine to make the mobile. Simple and easy! I can't wait til it's all finished so I can post a pic!
I was making this little monkey from an Amigurumi book that I have, He is so cute!

I am going to take 2 rings, 1 large, 1 small, and make vines to hang from it, 1 vine down the middle and 4 down the sides. I will place vines around each ring also. I will hang a monkey on each vine to make the mobile. Simple and easy! I can't wait til it's all finished so I can post a pic!
Saturday, January 12, 2013
Vine Lariat with Berries and Tiny Ladybird
I had a wonderful opportunity to test a pattern today. It is a Vine Lariat with Berries and Tiny Ladybird. The pattern is available at http://www.etsy.com/shop/BerthasBizarreBazaar.
I had a lot of fun crocheting this piece. I chose to do the vine in a chocolate brown, with a green/tan variegated mix for the leaves, I also added a few solid green leaves in the mix. I love the Little Ladybird (I call them Ladybugs) that accents the Lariate on one of the leaves.
I have a shop on etsy.com it's http://www.etsy.com/shop/crochetbyladyday. Etsy encourages you to join a team and I was lucky enough to find a team that brings designers and testers together. I spent today working on this piece and I can't wait to receive feedback from the designer.
The pic below is just the end of the Lariat with the Ladybug on the last leaf. I am going to use this as garland for a shelf I have in my livingroom. The original design is a scarf or necklace.
If you have the opportunity to try this pattern, go for it, it is a lot of fun!
Happy Hooking

Tuesday, January 8, 2013
Crocheted high top sneaker pattern
.jpg)
Abbreviations:
CH= chain, HDC= half double crochet, SC= single crochet, SC2TOG= single crochet 2 together, MC=Magic Circle, SLST= slip stitch, st(s)=stitch(es), TN=tapestry needle
Materials, 4 weight yarn, white, black & color of your choice (for this pattern I will use green)
Size F crochet hook, tapestry needle
Sole (white)
CH 2,
Round 1- 8 HDC foundation CH sts, 3 HDC in last foundation CH, work down opposite side, 6 HDC in next 6 foundation CHs, 3 HDC in beginning foundation CH, Join with SLST to first HDC
Round 2- CH 1, 1 HDC in same as CH space, HDC in next 6, 2 HDC in next 4 STS, HDC in next 7 STS, 2 HDC in next 3 STS, Join
Round 3- CH 1, 1 SC in same as CH space, SC in next 9 STS, 2 SC in next 5 STS, SC in next 10 STS, 2 SC in next 5 STS, Join
Round 4- Pull up loop of white and set aside *DO NOT CUT OFF WHITE*
SLST black in last ST made, CH 1, SC in same as SLST and in each ST around, Join and finish
Round 5- Pick up white loop, CH 1, SC in each ST around, join and finish
*With TN sew all ends in and snip off extra
Toe (white)
Magic Circle, 8 HDC in magic circle, Pull end of MC to form 1/2 circle,
Ch1, turn, 2 HDC in each st around, (16) sts
Ch1, turn, SC across flat edge of 1/2 circle 6 SC, (6 sts) finish off leaving long tail for sewing.
Locate center front of SOLE, count back 9 sts on each side, (turn sole inside out) attach toe to either side with long tail and sew along front of sole., finish off, sew in ends with TN
TONGUE (green)
SLST green to toe, SC 6 across, repeat to make 6 rows, finish off, sew in ends with TN. (6 sts)
SIDES (green)
Row 1- SLST green to left side closest to toe, SC in each st around (24 sts)
Row 2- CH 1, turn, SC in each st around (24 sts)
Row 3-CH 1, turn, skip 1st st, SC in each st around to last 2 sts, SC2TOG in last 2 sts (22 sts)
Row 4-CH 1, turn skip 1st st, SC in each st around to last 2 sts, SC2TOG in last 2 sts (20 sts)
Row 5- CH 1, turn, skip 1st st, SC in each st around to last 2 sts, SC2TOG in last 2 sts (18 sts)
Row 6- CH 1, turn, SC in each st around, (18 sts) do not finish off, (continue down edge)
EDGE(green)
CH1, SC in top of edge, CH2, SC, CH 2, SC, CH2, SC, CH 2, SC, continue to SC evenly spaced around tongue, at next edge, SC, CH 2, SC, CH 2, SC, CH 2, SC, CH 2, SC at top and finish
(4 holes for laces)
Laces
CH 100, (Or 30 inches long)
Lace through holes as you would a regular sneaker.
Logo on side (white)
CH 3 Join to form circle, SC 6 times in circle, join with SLST
round 2- 2 SC in each st around, join, finish. leave long tail for sewing.
Embroider star to circle with green yarn, Finish off, sew onto side of bootie with long tail.

Monday, January 7, 2013
Monday
Well, Happy Monday! I have found that trying to get time on the computer over the weekend is close to impossible. My husband and my son usually tie up the laptop. So I have to be content with blogging during the week.
I am finally going to have a craft room, I have always wanted one. We cleared out the small bedroom that we were using just for storage. We went through the boxes we had stored in there and got rid of ALOT of crap. We managed to condense it down to about 5 boxes. We have to empty or restore these boxes before we can really finish up.
My husband replaced the window yesterday, no more draft! We put together our desk. We have a beautiful marble top office desk that we had set up in our old house. We haven't been using it since we got the laptop, but we found the need to have the desktop running as well. Bring us to the computer. Again, my husband, got out the old desk top computer and cleared the hard drive. We are now up and running on both the desk top and the laptop now.
My husband and I are going to share the room. He ties his own flies for fishing. We are setting up a table on one wall for him and another table along the other wall for me. We also have overhead lighting that we were going to put in our old house, but we decided to move before it was installed. We are going to put one fixture above each work area to give us plenty of light.
I am going shopping today to price storage boxes and organizers.
I am so excited to get this finished I can barely stand myself! It will make a great place for me to be creative and to get my business, "Crochet by LadyDay" off the ground.
Happy Hooking!
Thursday, January 3, 2013
My high top sneaker adventure
I have been trying for some time now to find a pattern for the crochet baby high top sneaker booties, the ones that look like converse sneakers. I have tried a few patterns, tried to follow a few tutorials on youtube, but they all came out weird looking.
Last night I went on an adventure. I sat down and using my knowledge of how stitches work, along with the techniques from the patterns I tried to follow, I finally came up with something that works for me. I also need to give some of the credit to my husband, who has been very helpful, he gave me some ideas on what needs to be larger, smaller, move this here, that there, and other suggestions.
I finally came up with a sneaker that I am happy with.
I don't have the time to type out the pattern right now, however I will sit down and post a pic and the pattern tomorrow.
I'm so pleased!
Happy Hooking
Tuesday, January 1, 2013
Ice skate ornament pattern

I want to share with you what is truly my 1st pattern. My mother and grandmother taught me how to crochet when I was very young. I remember we would do a lot of crafting, especially around the holidays. I first made one of these when I was 10, I still have the 40 year old ornament hanging on my tree! It is a wonderful memory from my childhood. I hope you can pass this onto your children or just make a memory for yourself.
Materials: 4 weight yarn (2 colors), Size F hook, Large paperclips (2), sequins, fabric glue, tapestry needle
With primary color Ch 2
1) DC in 2nd ch from hook onto large loop of paperclip, DC 4 more times onto large loop, then DC 2 times onto smaller loop (7sts) ch 2, turn
2) DC in 1st DC, then DC in next 3 sts (4 sts), ch 1, turn
3) SC in 1st st, then SC in next 3 sts, at end ch 10 to 12 times, fasten off leaving a long tail for tying together
4) Sl st secondary color into 1st st from chain, holding a long tail of yarn across top of sts, SC in same st as joining sl st, then SC in next 3 sts (make sure you crochet tail under each st.
5) with both tails at front of skate, tie into a bow and adjust loops to desired size, trim off ends to desired length
6) with tapestry needle work beginning tail of yarn into piece and snip off.
7) with fabric glue, glue sequin to top of skate at the base of the long chain on both sides.
or you can glue 3 sequins down the front of skate on both sides to represent laces. Use your imagination and decorate as you like!
Make 2 skates and tie the end of the 2 long chains into a bow making bow desired size, cut off excess tail yarn
These are great to keep a bunch in your purse to hand out as quick little "Merry Christmas" notions.
I hope you enjoy making these fun little ice skates.
Happy Hooking!
Subscribe to:
Comments (Atom)